

Are you ready to roll up your sleeves and transform your living space with some DIY magic? Whether you’re planning to revamp that outdated bathroom, build a cozy deck for summer barbecues, or tackle minor repairs around the house, there’s nothing quite like the satisfaction of completing a home improvement project on your own. However, before you dive headfirst into sawdust and paint cans, it’s crucial to prioritize safety. Accidents can happen in an instant—turning your dream renovation into a nightmare if you’re not careful! That’s why we’ve compiled this list of 10 Essential Safety Tips for Your DIY Home Improvement Projects. From protective gear to smart planning strategies, these tips will help ensure that your creative journey is as safe as it is rewarding. So grab your tool belt and let’s get started—your safer DIY adventure awaits!
Introduction: Why DIY Home Improvement Projects are Popular?
DIY home improvement projects have taken the world by storm. With an abundance of online tutorials, social media inspiration, and endless possibilities for creativity, more people are rolling up their sleeves to transform their living spaces. Whether it’s a simple paint job or a complete remodel, the satisfaction that comes from making your vision a reality is hard to beat.
However, with great power comes great responsibility. While DIY projects can be fun and rewarding, they also come with risks if safety isn’t prioritized. Understanding how to handle tools properly and ensuring you take necessary precautions can make all the difference between success and disaster in your home improvement endeavors. Let’s dive into ten essential safety tips that will keep your DIY journey enjoyable while protecting both you and your space!
Tip 1: Do Your Research and Plan Ahead
Before diving into any DIY home improvement projects, take the time to do thorough research. Understanding what you’re getting into can save you a lot of headaches later on.
Start by gathering information from reliable sources like tutorials, videos, and articles. These resources often provide valuable insights that can guide your planning process.
Next, create a detailed plan outlining each step of the project. This not only keeps you organized but also helps identify potential challenges early on.
Consider factors such as budget and time constraints. A well-thought-out plan allows for adjustments if unexpected issues arise during the project.
Lastly, don’t hesitate to reach out to experienced friends or online communities for advice. Learning from others’ experiences can give you fresh perspectives and tips that make your project smoother.
Tip 2: Invest in Proper Safety Equipment
Investing in proper safety equipment is non-negotiable for any DIY home improvement projects. Whether you’re swinging a hammer or wielding a power tool, the right gear can prevent serious injuries.
Start with basic essentials like safety goggles and gloves. They shield your eyes from flying debris and protect your hands from cuts or abrasions.
Don’t forget sturdy footwear. Steel-toed boots are ideal, providing both comfort and protection on uneven surfaces.
Ear protection is crucial too if you’re using loud tools such as saws or drills. Prolonged exposure to high noise levels can lead to hearing loss over time.
Lastly, consider respiratory masks when working with dust or chemicals. Breathing in harmful particles isn’t worth the risk during your creative endeavors.
Remember, investing in safety equipment isn’t just smart—it’s essential for ensuring that your project goes smoothly without mishaps.
Tip 3: Understand the Tools You’ll Be Using
Before diving into your DIY home improvement projects, take the time to familiarize yourself with the tools you’ll be using. Each tool has its specific purpose and functionality. Understanding how they work can make a significant difference in both efficiency and safety.
Start by reading the manuals or watching tutorials online. Visual aids often help clarify complex instructions. Knowing when and how to use each tool reduces errors that could lead to injuries or damage.
Practice makes perfect, so try handling the tools on scrap materials before working on your actual project. This not only builds confidence but also helps you gauge which tools suit your style best.
Lastly, don’t hesitate to ask for advice from experienced friends or professionals. Their insights can provide valuable information that saves you time and enhances your skills as you tackle those exciting DIY tasks ahead!
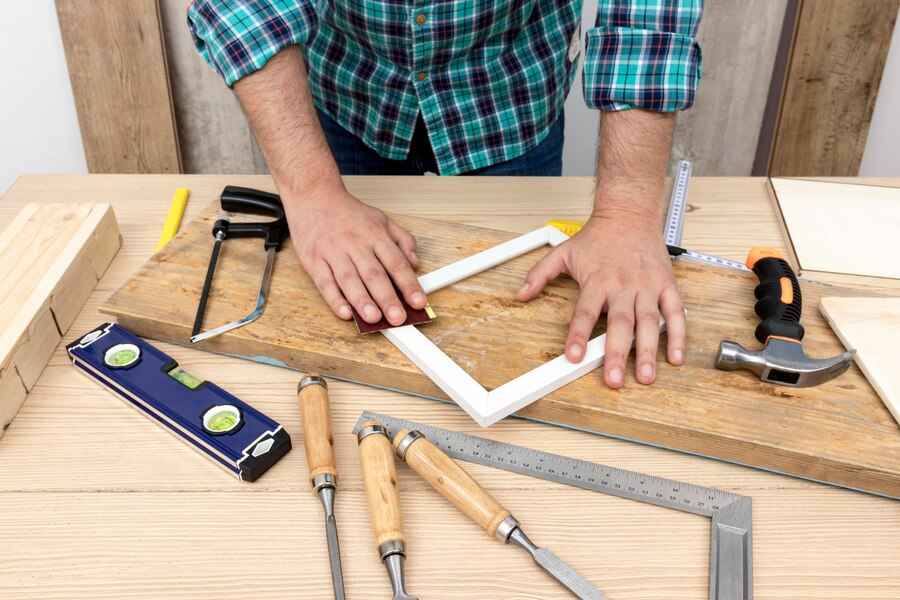
Tip 4: Always Wear Protective Gear
When tackling DIY home improvement projects, safety should always come first. One of the simplest ways to protect yourself is by wearing proper protective gear.
Safety goggles shield your eyes from dust and debris. A hard hat can prevent head injuries when working overhead or in tight spaces. Don’t overlook gloves; they not only provide grip but also protect against cuts and scrapes.
Additionally, consider a mask or respirator when dealing with paint fumes or harmful particulates. This small investment significantly reduces potential health risks while you work.
It’s easy to feel invincible during a project, but accidents happen unexpectedly. By prioritizing safety gear, you’re taking proactive steps to ensure your well-being as you create a beautiful space at home. Always remember that being cautious today can save you from serious consequences tomorrow.
Tip 5: Avoid Working Alone
When tackling DIY home improvement projects, having a buddy can make all the difference. Working alone might seem efficient at first, but it often leads to risky situations. A second pair of hands can provide support when you need it most.
In case of an accident or emergency, it’s crucial to have someone nearby who can help or call for assistance. This is especially important for heavy lifting tasks or working with power tools. Safety is paramount, and a companion enhances that.
Moreover, collaborating on projects can be fun and motivating. You’ll share ideas and tackle challenges together, making the experience enjoyable rather than overwhelming.
So next time you plan your project schedule, consider inviting a friend or family member along for the ride! Their presence not only boosts safety but also turns hard work into quality time spent together.
Tip 6: Keep Children and Pets Away from the Work Area
Safety is paramount when tackling DIY home improvement projects. One crucial aspect often overlooked is the presence of children and pets in the work area.
They are naturally curious, which can lead to accidents if they wander too close to tools or materials. Even a momentary distraction can result in mishaps that could have severe consequences.
Establish clear boundaries around your workspace. Use barriers like cones or tape to make sure they understand where it’s safe to play.
Communicate with kids about what you’re doing and why it’s important for them to stay away while you work. This not only keeps them safe but also helps cultivate an understanding of safety practices from a young age.
For pets, consider creating a separate space where they feel comfortable yet out of harm’s way. Their unpredictable behavior during busy projects poses risks that are easily preventable with careful planning.
Tip 7: Take Breaks and Stay Hydrated
When diving into your DIY home improvement projects, it’s easy to lose track of time. Hours can slip by as you focus on the task at hand. However, taking regular breaks is crucial for both your productivity and safety.
A quick pause allows your mind to recharge. Stepping away from what you’re working on helps you return with fresh eyes and new ideas. It also reduces the risk of fatigue-related accidents.
Hydration plays a vital role in maintaining concentration and energy levels. Keep water nearby and sip frequently throughout your project. Dehydration can lead to headaches or dizziness, which are not ideal when handling tools.
Consider setting a timer for breaks if you tend to get caught up in work mode. A few minutes off can make all the difference in how effectively you tackle that next stage of your project.
Tip 8: Follow Instructions and Guidelines
When tackling DIY home improvement projects, adhering to instructions and guidelines is essential. Every project comes with specific steps designed to ensure safety and success.
Before you dive in, take the time to read through all provided manuals or online tutorials. Each detail matters—one missed step can lead to costly mistakes or injuries.
If you’re using a product like paint or adhesives, follow label directions precisely. This includes drying times, application methods, and proper ventilation requirements.
Don’t hesitate to consult videos for visual guidance if written instructions feel overwhelming. Sometimes seeing someone else complete the task clarifies confusing points.
Finally, remember that shortcuts are rarely worth it in DIY projects. Skipping steps may save time but often results in more significant issues down the line—so stick with your guide!
Tip 9: Clean Up as You Go
Cleaning up as you go is a vital part of any DIY home improvement project. It’s easy to get caught up in the excitement and forget about messes accumulating around you. However, leaving tools and materials scattered can lead to accidents.
Regularly tidying your workspace not only enhances safety but also boosts efficiency. You’ll be able to find what you need without rummaging through clutter. Plus, it creates a more pleasant atmosphere for working.
Make it a habit to put away tools after each use or dispose of waste immediately. A quick sweep of the area can make all the difference in maintaining focus and motivation throughout your project.
Consider keeping trash bags or bins nearby so that disposal is effortless. This simple practice will save time at the end and help keep distractions at bay while you’re immersed in creativity.
Tip 10: Know When to Call a Professional
Sometimes, DIY home improvement projects can become overwhelming. It’s essential to recognize when a task exceeds your skills or comfort level.
If you find yourself facing complex plumbing issues or electrical work that requires expertise, it’s wise to seek professional help. These tasks often involve safety risks and potential code violations.
Additionally, if you’re investing time and money into a project with no progress in sight, calling a pro can save you both stress and resources in the long run.
Remember that knowing your limits is part of being a responsible DIYer. There’s no shame in asking for assistance when the job demands specialized knowledge or tools beyond your current capabilities. This decision could ensure not only the quality of work but also your safety throughout the process.
Conclusion
DIY home improvement projects can be incredibly rewarding. They offer a chance to express creativity while enhancing your living space. However, safety should always come first. By following these essential tips, you can ensure that your projects are not only successful but also safe.
Taking the time to plan and prepare lays the groundwork for a smooth experience. Equipping yourself with proper safety gear and understanding how to use your tools effectively reduces risks significantly. Remember, it’s important to maintain a clear workspace and stay hydrated as you work.
Working with others not only makes tasks easier but also ensures help is at hand if something goes awry. Keeping children and pets away from the area minimizes distractions and potential hazards.
Lastly, knowing when to step back or call in professionals is just as crucial as any other tip on this list. Embracing these practices will empower you in your DIY endeavors while keeping safety front and center—a win-win situation!